Bird Photography Tip: Use Light to Your Advantage
The time of day you choose to photograph birds will have a major impact on the emotion of your images. The same elements that make beautiful sunset stir up emotions in a landscape image apply to your bird photography. The key to a great bird photo is having multiple elements that come together in a one-of-a-kind scene. Effectively lighting techniques have the power to transport your viewer to the moment your photo was shot.

Bird photography can be an incredible hobby when you get everything working right. What I mean by that is, you completely understand what your camera and lens are capable of, and you’re comfortable using them. If you’re reading this post, chances are you have already caught the photography bug – and capturing photos of birds excites you. (We get it)
Seeing a colorful bird through your camera lens that once only lived on a page in your field guide is exhilarating. Adding to your ongoing collection of wildlife photography is your life’s work. It’s the most rewarding on-going project in your life.

Like all challenging hobbies, some simple principals and strategies exist that can change the trajectory of your skills in an upward direction. What I’m trying to say is, there are a few lessons we learned the hard way.
In the following post, we’ll give you one of the most useful pieces of advice possible. These bird photography tips can make the difference between an average photo, and one that gets noticed. Whether you post your bird photos on Facebook, Flickr or Instagram, the following tips will make your next photo stand out in a busy gallery.
Understanding the Importance of Light in Bird Photography
This may seem obvious to some, but when it comes down to it, photography is all about light. Bird photography is no exception, as understanding how to read and adapt to outdoor lighting conditions is essential for success. If you take away anything from this post, make sure it’s that lighting is the single most important factor of a pleasing bird photo.
It’s not hard to keep the basic principals of this concept in mind, and they’ll make a BIG improvement to your photos. Some of these tips may seem obvious, but keeping them in mind during your next outing should give you a good chance to improve your technique.

Keep the Sun Behind You
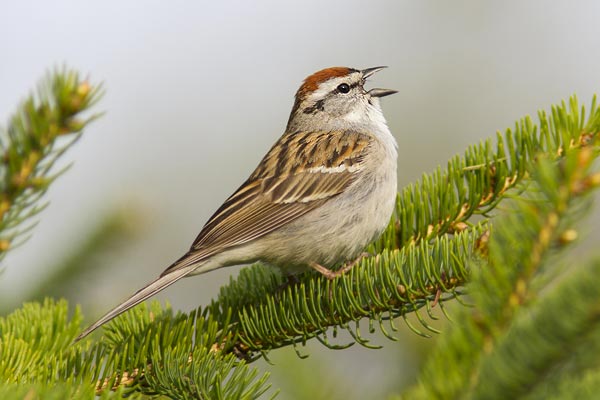
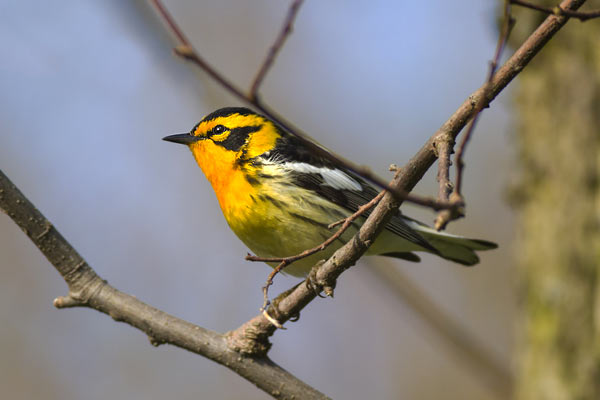
This one is easy, but you’d be surprised at the number of photos I see without this simple tip in place. In general, you always want to have the sun at your back. (We’ve had plenty of sunburnt calves to prove this!) The sun should light up your subject, and reveal the beautiful colors of the bird’s plumage. Birds are some of the most incredibly beautiful animals in the world. Their feathers reflect sunlight to create vivid (and seemingly un-reproducible) intense colors that keep you coming back for more.
The problem is, without proper lighting, you are selling these stunning creatures short – and not capturing the true beauty of your subject. Even the most vibrant bird will look rather drab and featureless with the sun behind it. (I’ll cover the exception to this rule below).

It’s all about the catchlight
You have probably heard of the term “catchlight” in regards to bird photography before. Without this key aspect of your bird photo, chances are the image will fall flat. Catchlight refers to the reflection of the light source (Ideally, the sun) in the bird’s eyes.
This small, yet crucial element, can make all the difference in the world. Go ahead and look at all of your favorite images of birds on Instagram, and I bet almost all of them show catchlight in the bird’s eyes. Believe it or not, it’s not uncommon for some photographers to add catchlight artificially, during the post-processing stages.
As we’ll soon cover in a future post, making sure that the bird’s eyes are in focus and well lit are essential for an aesthetic bird photo. If you succeed in capturing a reflected white highlight of the sun in the bird’s eye, you’re rewarded with a photo that stands out in a crowd.

Don’t shoot into the sun
If the sun is shining towards you, and the bird is between you and the sun, you’ll get an image of a shadowy bird with no catchlight. To makes matters worse, shooting into the sun creates new problems such as Chromatic aberration. This is the purple (or sometimes green) color fringing on the edges of your subject or the surrounding environment.

Better lenses will help avoid this scenario, but shooting in the direction of the sun is almost always a bad idea. Instead, position yourself to have the sun directly behind you whenever possible. I realize that following a moving bird means that you can’t always shoot where you want to, but be patient and hope that your bird eventually lands in a more desirable shooting environment. We’ve learned to not waste memory card space shooting a bird in unfavorable lighting conditions.
One exception to this rule is if you are trying to capture a silhouette of the bird’s shape (completely black) with a colorful sky or landscape behind it. This technique requires a faster exposure speed and can lead to some incredible images. These types of shots usually work out best at sunset, and make for a highly artistic image. I would group this type of image in a different category (landscape) than we usually cover on this site. In most cases, you’ll want to let the sun light up all of the subtle features of your subject.
Shoot during the Golden Hours
The early morning hours and evening are known as “the golden hours”. Just as landscape photographers treasure these hours, so too can us nature photographers. Not only is the sun on an advantageous low angle for bird photography, but the extra atmosphere in the way of our star turns everything in its path to a golden color.

Birds in flight or on the water benefit most from this phenomenon. Some of the most spectacular images of waterfowl are captured with the camera just inches above the water, with a low golden sun behind the photographer.
The same goes for a bird in flight. Have a look at the Short-eared owl soaring through the sky at dusk. The golden hour creates a vivid atmosphere while lighting up your subject with remarkable warm hues. This is especially noticeable on a bird with white feathers. There will turn a soft orange or pink as the sun sets.

When the sun is barely peaking above the horizon, a bird in flight catches rays of sunlight that are not hitting the ground. It creates a stunning scene of a well-lit bord against a dark moody background. This is the ultimate example of the power light has in a nature photograph.
Our tips for photographing a bird in flight
Avoid shooting in the harsh mid-day sun
You’ll find that most serious bird photographers avoid shooting during the middle of the day. This is because the sun is at its highest point in the sky overhead. Imagine taking a flash photo of someone with the flash going off directly over their head. It creates unflattering shadows for both humans and birds.
The light is harsh and unforgiving. It creates problems like overexposure, as the camera tries to balance out the dark shadows and bright highlights in a single shot. Do yourself a favor, and take a break from birding at lunch.

Use Aperture Priority mode
As for the camera settings we use, in general, we shoot using Av mode (Aperture priority). This is an extremely useful mode for bird photography because the camera will decide the correct exposure length to use.
For example, with a fixed ISO of 400, we can continuously shoot a bird that hops from branch to branch in an out of various lighting conditions. This method avoids the potential of under/overexposing your subject by using a fixed exposure length.
If the weather takes a turn for the worse, and the sky becomes cloudy or overcast, you’ll need to increase your ISO to compensate for lower light levels. For bird photography, it’s always better to add a little noise than it is to take a blurry shot using a slow shutter speed. Noise can be fixed, an out-of-focus shot can’t!

When shooting in manual mode, you have complete control over each setting. This is great when you have predictable consistent light, but that rarely happens when chasing most of the smaller birds. (Warblers are the ultimate challenge). Waterfowl are often sitting comfortably in the sunlight as they cruise on open water – so manual is the best choice here.
But for a fast moving target foraging for insects in a tree, aperture priority mode can be your best friend. Although, if you are willing to sacrifice some potentially amazing shots by waiting for your bird to land in your ideal location, by all means, stick with manual!
The typical settings for our best shots are:
- ISO: 200
- Exposure: 1/1000
- Aperture: F/5.6
We’ll be sure to post a more detailed description of this method in the near future.

Are their exceptions to these rules?
Favorable lighting conditions are the single biggest factor to consider when attempting to photograph birds. No amount of post-processing in photoshop can fix an image with rotten lighting. (Trust me, we’ve tried!). Yes, this means that a dreary, overcast day will make it extremely challenging to capture a decent photo. Whether you decide to still go out and shoot will likely depend on the bird you’re going after.
For example, for a Snowy owl – Ashley and I will take our chances during a blizzard. It’s just too remarkable of a bird to wait for the conditions to be right.

As a matter of fact, certain unfavorable lighting conditions can play in your favor, but it becomes much more challenging. Using the Snowl Owl as an example, imagine a photo of a Snowy owl in flight with falling snow all around him. Even a dark shadowy photo will showcase the mood and feeling of the moment. Like I said, its possible to produce an amazing photo during these times, but much more difficult and hard to predict.
Bird Photography Tips: Understanding The Importance of Light
- When possible, shoot with the sun behind you
- Plan your photography sessions around the golden hours
- Make catchlight a top priorityAvoid shooting in the harsh mid-day sun
- Be patient and wait for your subject to enter a favorable location
- Use Av mode (Aperture Priority) to help adapt to changing light levels
- Bump up your ISO in low light conditions
The bottom line is, keep the current lighting conditions top of mind at all times. It’s often better to align yourself to have the sun behind you and wait, then it is to fire away towards the bird wherever it lands. This will require a high level of patience and control – as most times the bird will never land in a position that’s just right.
But sometimes, they do… and that’s what it’s all about.
