Save Time using a Post Processing Screening Process
When we return from a bird photography trip, we are then faced with the challenge of reviewing and processing 1000’s of images. This is an exciting time, as we finally get to see the results of our hard work in the field paying off. However, it’s a time-consuming process that demands a concentrated effort to get right.
The last thing we would want to do is to rush through this process, and potentially delete some of our best photos by accident. Also, it would be a shame to invest hours of work into processing an image that did not have the critical basic elements of a great bird photo.
If you have ever been in a situation where you are sitting on a large volume of RAW images from a bird photography trip, I am sure you can relate. In this post, we will discuss the advantages of filtering and screening your best images out of the bunch. We’ll also talk about the importance of developing a processing workflow that you can replicate in the future.
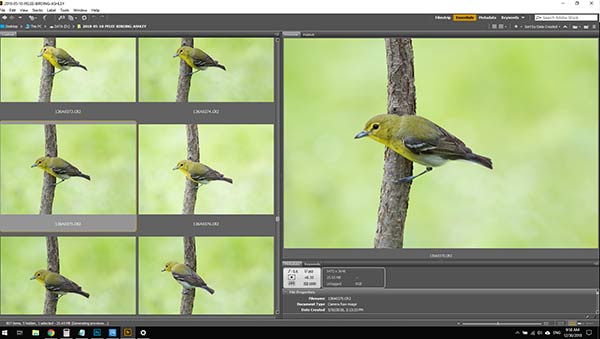
Reviewing our bird photos in Adobe Bridge
Before Post Processing and Pre-Processing…
Post processing is arguably the most exciting stage of this rewarding hobby. However, there is a lot of filtering and sorting that must take place first. The screening process involves qualifying the images that have what it take to meet critically important photo elements such as focus and lighting. Avoid the temptation of diving into a lengthy post processing routine on a photo selected from a sea of RAW files on your memory card. Instead, separate your top contenders from the mix to ensure that you are only investing time in your absolute best data from the field.
The Importance of Developing a Workflow
To improve the efficiency of your image processing efforts, create a workflow that allows you to streamline the process. It doesn’t take very long to create a simple checklist that you can use for next time. This way, you can be sure that no step is missed, and that you handle each phase in an organized manner. A bit of work up front will save you hours of time in the future.
Everyone’s workflow will be slightly different, because it will reflect the type of camera gear you use, and what your intentions are for the final image. For example, a different process is used on images that we plan on printing on large format mediums, versus ones that will appear on our website or another online gallery. The intended size of your final image may affect the way you approach your screening process, as smaller images can get away with less resolution and clarity from the start.
It’s the ordering of these steps that you will need to establish. You may even have separate workflows for bird types, or the camera equipment used. In this post, we’ll reference our workflow for capturing small warbler-sized birds with 300mm and 400mm camera lenses in the spring. These creatures are a challenging subject, but well worth the time spent in the field and behind the computer screen.
The software we use for this process is Adobe Bridge, Adobe Camera Raw, and Adobe Photoshop. Bridge is first, as it allows us to review a large number of images at a glance. Adobe Camera Raw (ACR) is next, as it includes powerful pre-processing actions such as noise reduction and white-balance control. Lastly, Adobe Photoshop is where the real magic happens. The majority of our bird photography post processing takes place here.

The photo of a Northern parula managed to pass our strict guidelines for processing
The Screening Process
The very first step of your processing workflow is the filtering and screening process of selecting the images you wish to edit. When you know exactly what to look for, you can drastically reduce the amount of time spent sorting through your raw images. For example, if the birds head is turned and not in view, are you really going to want to keep it?
Photos that lack the critical requirements you have established are easy to throw away without second guessing your decision. It’s simply a matter of defining what these parameters are.
In the following video, we explain the process of deciding which bird photos are worth post processing, and which aren’t. Please subscribe to our YouTube channel for more tutorials like this!
If you’re shooting many different species in a single photoshoot, your screening process may vary. The same is true if you have changed lenses and photo types in a single batch of photos. It’s best to first sort your images into groups of similar shot types. This will make setting the parameters for each image easier, so that there are fewer variables to slow you down.
An example of this is our batch of warbler photos captured during the annual spring migration at Point Pelee National Park. Every one of these images was captured with a 300mm-400mm telephoto prime lens, and the subjects are all small songbirds and warblers. If we spent a day photographing larger birds such as herons and waterfowl, we’d batch these together and approach the images with a different workflow.
All of this upfront work will help make the process of sorting and processing thousands of bird photos less time-consuming and more enjoyable.
An Example Workflow
The first phase of this process involves filtering out the bad photos from the mix. This means that you’ll need to quickly identify which images do not meet your basic expectations so that you can discard them without questioning your decision.
In the beginning, it’s tempting to just save all of your images in case you feel the need to go back and edit a particular shot. This may feel like you’re being cautious to preserve your precious data, but it can quickly consume all of your hard drive space, and slow your workflow down considerably.
A typical set of photos will have 80% or more photos in the folder that do not meet our expectations. This is the reality of shooting lighting-fast shots of birds using the high-speed shutter. A series of 10 images in succession will have 1 good image, if we’re lucky.
This may seem excessive, but it’s one of the best ways to increase your chances of capturing a remarkable photo.
The key to this step is to quickly isolate the images that can be discarded quickly because of an obvious flaw. This stage is crucial if you’re looking to maximize your time spent at sorting through bird photos. If you notice anything obvious from the list below, deleting the file is an easy decision:
- The bird is not in the shot or cut off
- The bird is blurry due to motion
- The photo is out of focus
- The photo is severely under/over-exposed
Even if 4-5 of the elements of a great bird photo are there, missing one key aspect such as catchlight or critical focus can be enough to remove the file from consideration.
You may have to make some tough choices at first, but over time you will feel more comfortable deleting photos that had no chance of becoming a great photo. Many of the factors that go into making your final selections are subjective. For example, the photo below of an Orchard Oriole shows that the bird is being partially blocked by a tree branch. However, the pose, stunning background and the fact that this species is uncommon for us, passed our qualifying process. You may find that the more rare the species is, the less critical your screening process becomes.

This Orchard Oriole’s pose and background won our hearts over during the screening process
A typical workflow for filtering our photos
To browse through our RAW image files efficiently we use an application called Adobe Bridge. This member of the Adobe Creative Suite is a popular image preview software for photographers, and it allows you to view and organize RAW image files from your digital camera. There are countless ways to preview your images in Bridge, complete with important EXIF data about your shots.
This application makes sorting through thousands of photos at a glance enjoyable. It’s easy to identify photos that clearly do not stand a chance of becoming a great shot. We like to hold down the CTRL button and select the obvious duds from the mix before filtering them down any further. You can also tag any photos that need to be inspected on a deeper level later using the “label” function available with a right click of the mouse.
Once the obvious photos have been discarded from your image folder, you can then filter down to the photos that are critically sharp. This is something that can not be easily judged at a glance, so you’ll need to zoom in to see the photo at 100%.

Using the zoom tool in Adobe Bridge to see if the photo is critically sharp
To do this, we use the zoom tool in Adobe Bridge for an up close look at a targeted area of the photo. We usually place the tool directly over the birds eye(s) or beak. If the birds head is not critically sharp, the photo does not get processed any further.
The process of filtering out shots that are not critically sharp is much faster once you have narrowed down your image folder to only the top contenders. This way, you can focus solely on the sharpness of each photo without thinking about other aspects such as pose, because you’ve already done this. In terms of our step by step screening process, the order we use looks a little something like this:
- Framing
- Pose
- Lighting
- Composition
- Background
- Focus
This order narrows down each image from the most obvious flaws to focus and sharpness. Any images that pass these checks are well deserving of a lengthy post processing routine in Adobe Photoshop.
Final Thoughts
At this stage, you should have only your best bird photography images isolated to one folder. This is an exciting stage of the process, as you are now looking at all of your hard-earned photos that meet your strict guidelines. Ideally, our memory cards would only contain images of this quality when we return from a photography trip, but that’s never the case. The truth is, only about 5% of the exposures we shoot are worthy enough to process. This screening process qualifies that our images have the potential to stand next to some of the best bird photography images we’ve seen online.
In a future post, we’ll share our complete post-processing guide that will take you from a RAW image file to the end result.
Related Posts:
Our Top 5 Bird Photography Tips for Beginners
Our Camera Gear for Bird Photography
Tips for Capturing Birds in Flight